

|
|
|
|
page 1 | 2 | 3 | 4 | 5 | 6 | 7
Introduction
The flour and water get stirred together to make cheap, thin glue. The newspaper strips are dunked in this glue and draped over some form, creating a skin. When this skin dries, it maintains its shape. Shazam! No chisels, no kiln, and no fumes. Unfortunately, the lifespan of paper mache is short. The paper skin is flammable, susceptible to moisture damage and attractive to insects. You should not let this discourage you. I've found that the temporary nature of paper mache projects encourages fun and experimentation, two pillars of studio art.
|
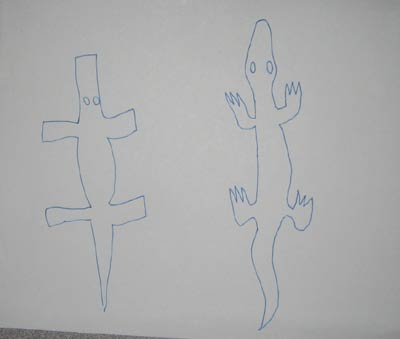
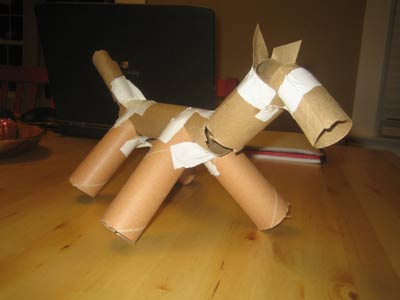
Get Started! You should try to draw it first. Here it is: For other people, this is when they should expand upon their project idea, to get a clearer idea of how their project is going to look when it is completed. One way to do this is to draw it. Another way is to print up a few images from the internet. I suspect that some people reading this might protest having to draw their project first, but I still encourage it. By attempting to draw it, you will face and solve a bunch of little design challenges before you get your hands dirty. For example, if you have the idea to make a paper mache alligator, and you don't draw it out first, you will probably start building a long body shape, and attach legs after that is finished. For example, the legs might end up poking out perpendicular to the body, because the design will be made up as you go. |
Prepare Armature Balloons The downside is that balloons tend to deflate in one or two days, so any projects built with them need to be completed and dried in that time. Quick-drying techniques can also backfire with balloons, because they can expand, busting through the new paper skin. I've also used a couple cousins of the balloon to build an armature: Inflated plastic packing pillows and bubblewrap. |
Other heavy paper is well-suited for building an armature, such as cardboard tubes from wrapping paper rolls and Fed-Ex shipping tubes.
|
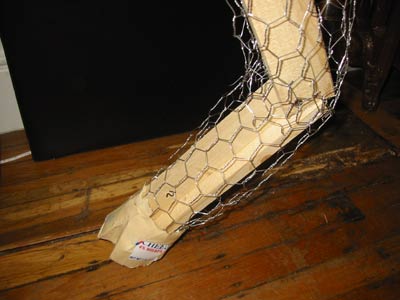
You will probably find that gloves will be more trouble than they are worth, because your fingers have to dance through the holes as you work.
|
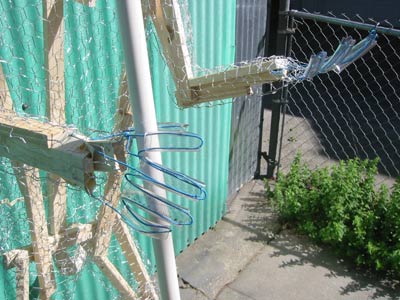
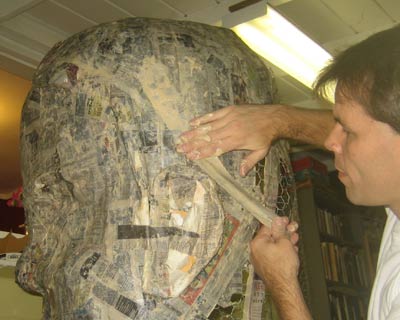
Past the size of a laundry basket, a chicken wire structure is too flimsy to support the weight of wet newspaper. Therefore any large sculptures will need a skeleton underneath. I recommend using 1x2 lumber and wood screws. 1. the skeleton for your sculpture will need to be very close to the surface of the skin. People, plants and animals look more natural if they aren't made up of 90 degree angles. It isn't as easy to screw them together at odd angles, but they will look a lot better in the final result. Two-liter soda bottles, fed-ex shipping tubes, the plastic from sour cream tubs and crumpled aluminum foil are also good choices for building cheap armatures. |
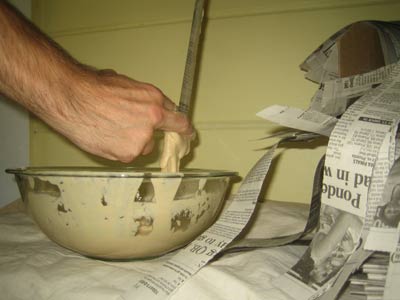
Make paste
|
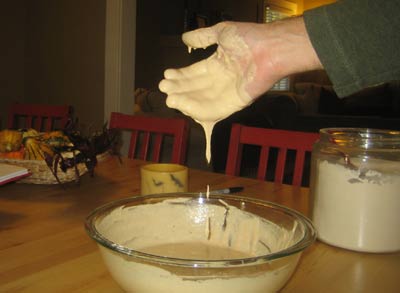
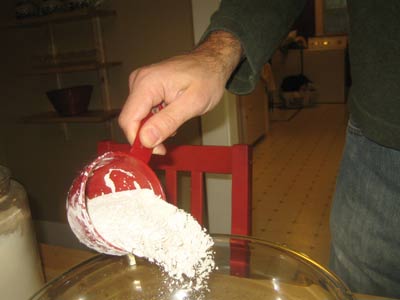
Step 1: Go to the bathroom. Your hands are going to be in warm water for the next 45 minutes, so you might as well empty your bladder before you get started. Mix 3 cups water with 2 1/2 cups flour. I usually use my hand for mixing because it is easy to smoosh the chunks of flour and get them mixed in to a nice thick soup. Warm water is more enjoyable, but optional. I'm sure that this paste would work in both a very thin and a very thick consistency, but I prefer a particular viscosity. Make your paste as thick as pancake batter. Thinner than honey. Thicker than tomato soup. Thinner than white school glue. Thicker than egg nog. |
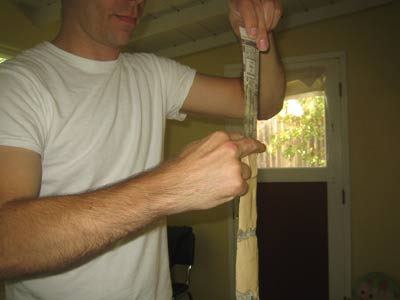
Strip tease |
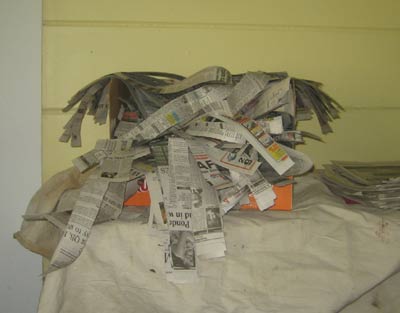
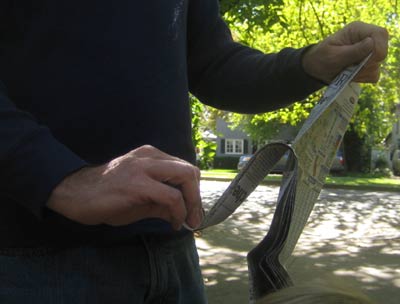
As you tear off the strips, toss them into a loose pile. With luck, the bundle of strips will flutter apart a little bit as they land. This should make it a little easier to grab individual strips when you begin using them. I don't know how many you will need. Make a big pile. If you mess up some of the strips, making them too thin or too thick, just throw them away. Also, avoid using the extra glossy ad inserts from the newspaper. Those don't absorb paste as well, and finally, don't use strips which have a sharp fold along them, they don't lay flat. |
|
Paper Mache! Hold one end of a single strip of newspaper and dunk it into the bowl of paste. The paste is actually too thick for the newspaper to sink, so you should use the other hand to poke it into the bowl. You don't have to completely submerge the strip. As long as at least one side is gooed up, it should work. Pull the strip out of the paste and hold it above the bowl. If one side is totally dry, I usually use my hand to smear a couple of globs of paste onto it. |
|
Next, use a two-finger squeegee move down the length of the strip. |
|
This will scrape off most of the paste and spread it around. Ideally, when you get to the bottom of the strip, it will be completely wet, with just a thin layer of paste covering the whole thing. Lay the strip across your structure. It might not have much "stick" at this stage, especially if you are working with chicken wire. I recommend starting at the top of your armature, where gravity won't pull it off. Once the strip is on the structure, smooth it down flat with your hands. |
|
If you are really having trouble getting the strips to stick to chicken wire, try poking one end through the hexes, and touching the end of the strip to itself. Once you have a few strips on there, it should become easier. Wet newspaper tears easily, and it sticks to itself, so it takes a little experience to tame these strips and get them onto your sculpture. |
Use half-strips or smaller pieces in areas where long strips are ungainly, such as where the surface is made of sharp angles.
|
Do not start the crossword puzzle as while you are gluing the strips down. |
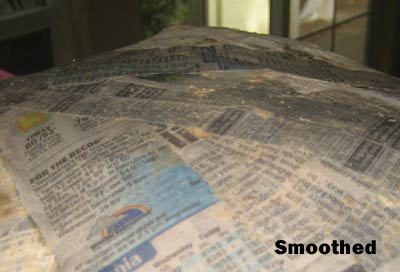
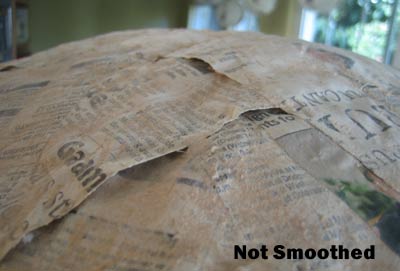
Be sure to smooth the strips down with your hands. This isn't as important in the beginning, but it is very important for the top (final) layer. |
|
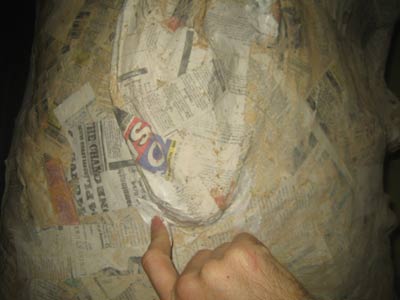
The wet strips of newspaper should be smooth and they should conform to the shape of whatever they are covering, just like a wet T-shirt. The edges of each strip should be stuck down. If the paper is popping up off of the surface, try smearing an extra couple of tablespoons of paste onto that part of the paper. Beginners can find it surprising that the sculpture is turning out to look exactly like the armature. That it doesn't hide flaws. They also may find it difficult to "build up" places in the sculpture (such as constructing a nose or ear) with wet paper. Maybe I should have mentioned this earlier. |
|
I find it very satisfying to apply the final strips. Check the entire surface for small holes between the strips, and try to keep the finished surface smooth. Larger projects need more than one session of paper-applying, because you won't want to work on the feet while the hat is still wet.
|
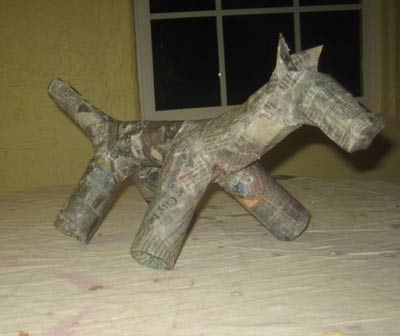
When you are finished applying paper, clean up. Store the unused paste covered in the refrigerator, or just throw it out and make fresh stuff tomorrow. Depending on the temperature and paper thickness, it will take between three and thirteen hours for the paper to dry. If your sculpture contains balloons, do not try to hasten the drying with direct sunlight or a heat gun. The heat can cause the balloons to expand, bursting out of their paper shells. Fans are OK. It is easy to see when the paper is dry. The color becomes much lighter. Behold! The paper mache sculpture is finished, ready to be finished with paint or crepe paper. |
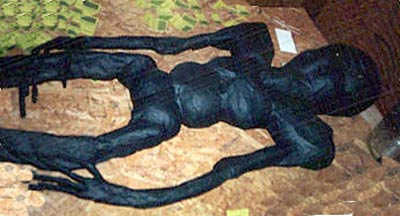
Painting Every type of paint seems to work with paper mache. Latex house paint, craft paint, spray paint. The only problem I can imagine arising is if the paint is so sloppy wet that it softens the paper mache. One coat of paint is usually enough.
|
And that should do it! Now that you have read all of the above, you are more than ready to give it a try. Good luck, and don't forget to take photos while you are working, not just of the final result. To read more about the projects featured on this page, please read my other paper mache-related articles: Paper Mache Globe |
|
Please continue reading page 2 of Easy, Illustrated Instructions on How to papermache. |
contact Rob | Changing Brake Pads |
How to replace the starter cord on a lawnmower |
How to make coffee | How
to cut and paste | How to change a flat tire | How to fight a
traffic ticket in court |
Science Club |
How much is inside? |
Home |
Incredible Stuff I Made | Pranks
| How to Guides
October 29, 2007
 hicken wire
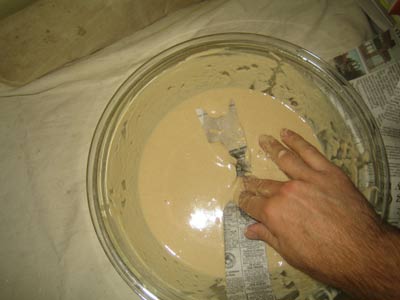
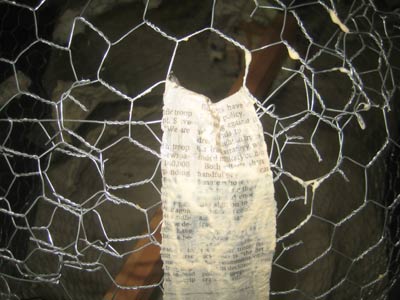
 Overlap paper strips at wild angles, covering every inch of the sculpture frame. It is difficult to keep track of which areas are thinly covered and which areas are thick, but I'm going to give you the following guidelines anyway: If the internal structure is a balloon, or other temporary structure, you will need to use about four layers of paper to create a self-supporting exo-skeleton when this paper dries. If you have a rigid armature, such as chicken wire or soda bottles, you only need two layers.
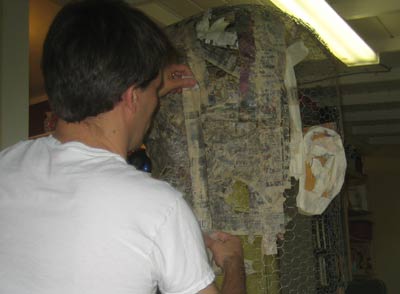


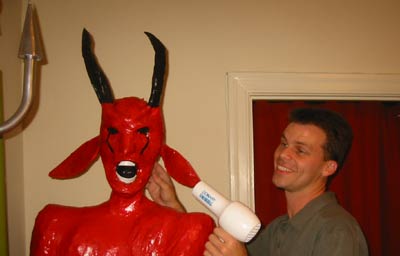 I'm no expert at painting, so I have almost always chosen color schemes which are plain and cartoonish.