
|
|
|
page 1 | 2 | 3 | 4 | 5 | 6 | 7
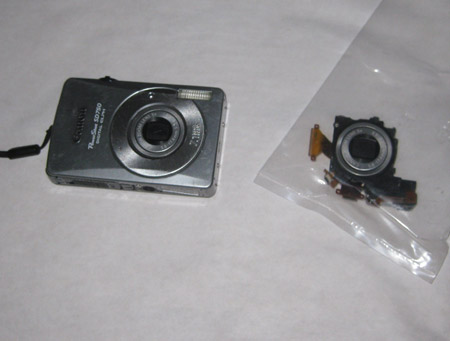
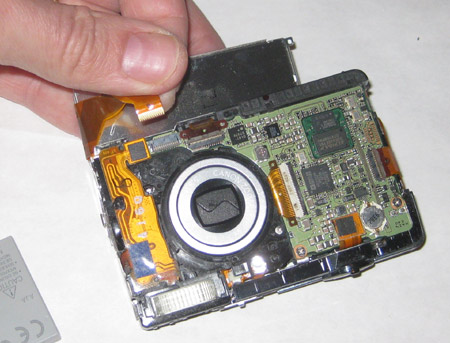
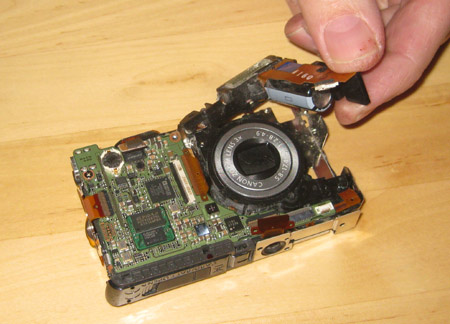
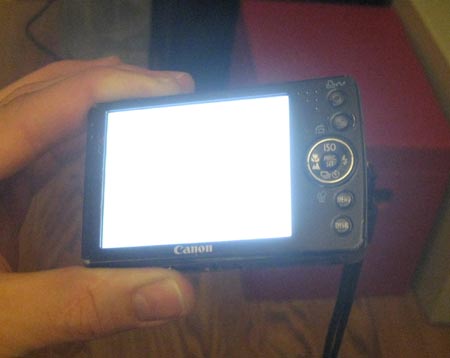
One day, after a short adventure with my toddler son, my Canon SD750 developed an odd dark spot in the middle of the image. It was just bad enough to ruin every photo. At first I was not sure if it was a lens issue or a LCD issue, but the dark spot only showed up on new photos. When I viewed old photos, the camera didn't show a spot, so it was the lens. Zooming in confirmed this. As I zoomed, the spot got darker and had sharper edges. A crack also seemed to appear in the image. Damn. This camera was only about 14 months old, but out of warrantee. Damn. After a quick look for easy fixes online, I bought another camera, the Canon SD790 IS. The SD750 sat on my desk broken and unused. I hatched a plan to sell it either as a portable digital photo frame or as a "haunted" camera, with superimposed images on every shot taken in places which were inhabited by spirits. |
After a few weeks, I happened upon a guy in Morrow, GA selling digital camera parts. He had for sale on ebay the exact lens mechanism that I needed. Bidding started at $20. He was also selling LCDs and other parts. I had no idea if I'd be able to replace the lens mechanism on this camera. The photo he was showing indicated that this lens was deep inside the guts of the camera. This swap would be akin to an engine replacement, not just a tire change. I had no idea what obstacles were in this thing. Luckily, I wasn't counting on this camera anymore. It was effectively a spare. It probably still had a scrap value of $50, and I had invested another $20 in the new lens. I wanted this to work and I figured I had about a 50% chance at fixing the thing. I went for it.
|
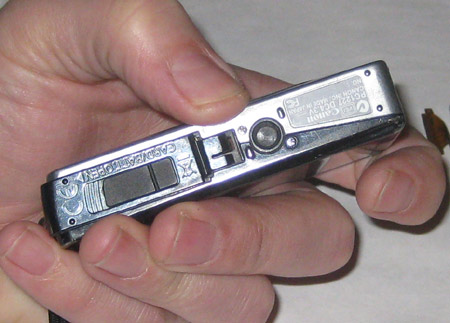
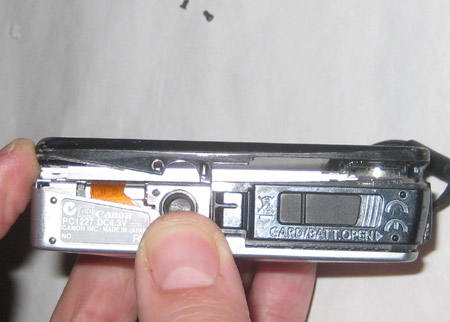
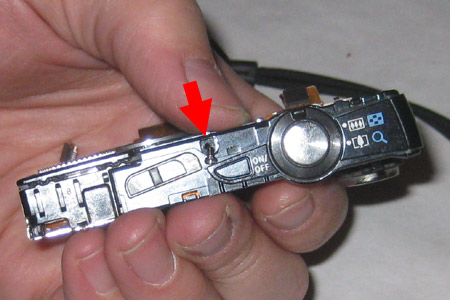
Remove the battery and the memory card. Only about six screws were visible from the outside of the camera. |
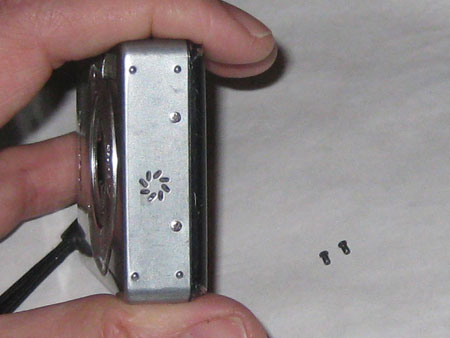
I recommend stashing removed screws into a well-labeled ice cube tray. Label the cubicles with a little description on post-it notes, clockwise in the order you removed them. Sometimes I fool myself into thinking that I'll be able to remember where five or six screws go on a project like this, but guess what? Inside there are 25 screws, in three different sizes. That is 19 more than I can remember without some sort of organization system. Next, I removed the two screws on the strap bracket. |
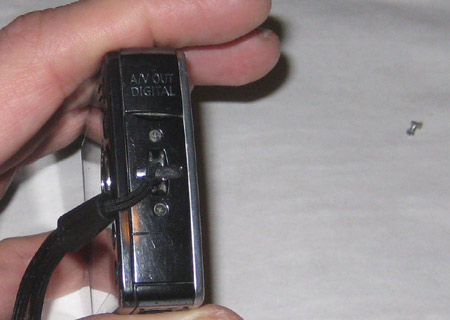
Then the two screws above and below the speaker port.
|
With a little wriggling, the black back plate came free. |
This exposed a single screw holding the LCD screen on. |
|
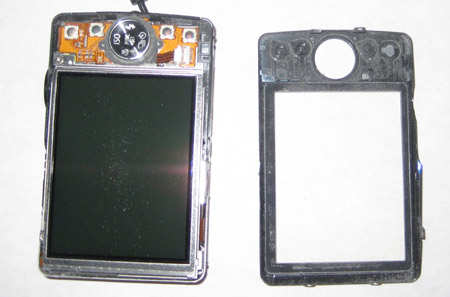
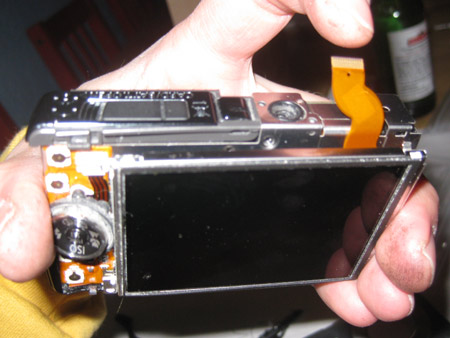
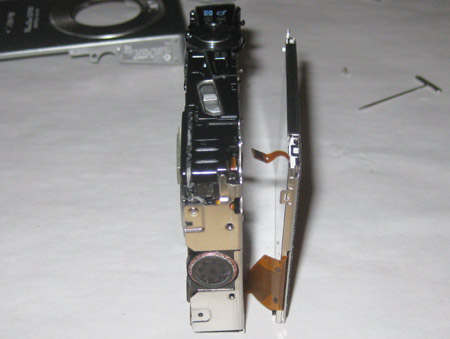
The LCD screen should tilt up and free. I believe that there is a thin light source plate stuck to the back of it. I've heard that the wide one is for the video signal, and the narrow one is for the LCD light source. |
With the screen tilted out of the way, remove the wrist strap plate and wriggle the silver camera front loose. Discard. No! Wait. Keep that. With the camera front plate removed, you should be able to unplug the screen.
|
|
Note that the wide ribbon folds over itself to lay flat. |
|
I have attempted to photograph it, but that wide ribbon is difficult to portray in two dimensions. Remove the screen and set aside. |
|
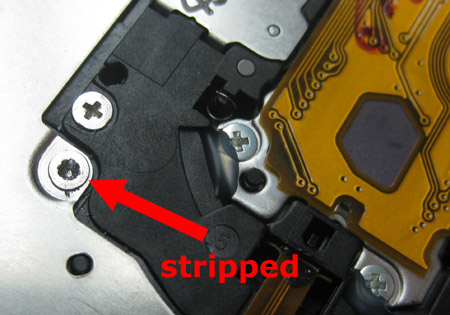
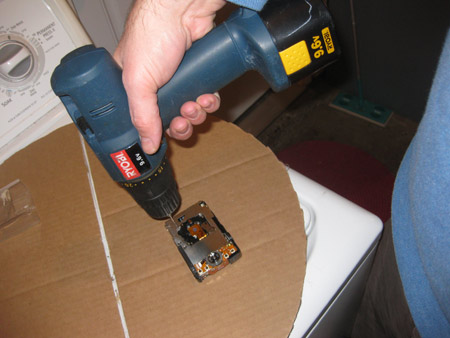
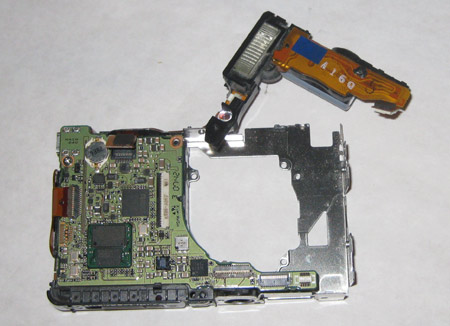
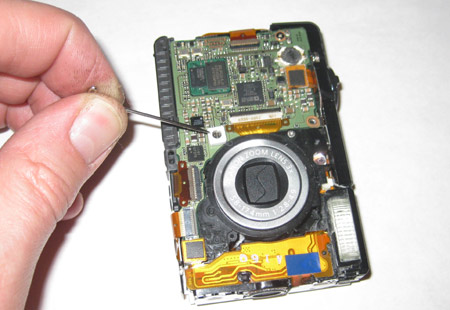
Next, beneath where the screen had been, remove four screws holding the lens mechanism to the camera body. These screws are really tight and really small. I was unable to remove them with any of my small screwdrivers. I tried for a long time, trying each of four small screwdrivers. I used an inappropriate amount of force, trying to jam my big screwdriver into the teeny screwheads. Two screws came out eventually, but the other two refused. I kept at it until I had nearly broken off the screw heads, stripping out the cross in the philips head. I was stuck.
|
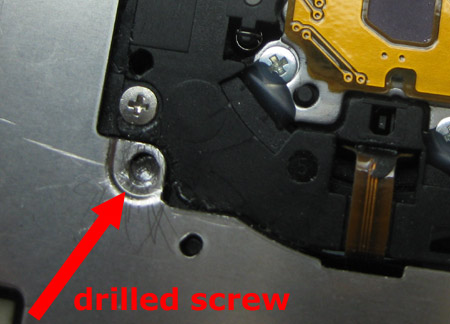
Stripped. |
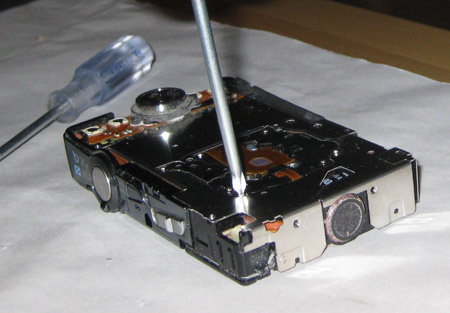
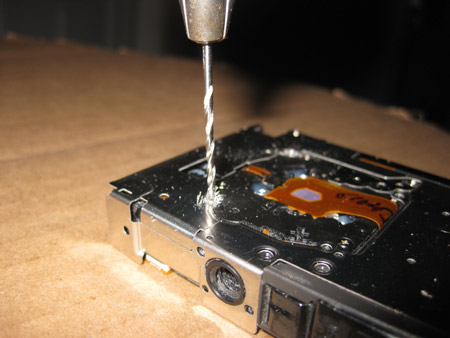
Undeterred, I drilled them. |
Using a small drill, I was able to grind the heads off the screws completely and get the lens mechanism free. The shaft of these screws were left behind, but I wasn't going to use that haunted lens mechanism for anything anyway. |
|
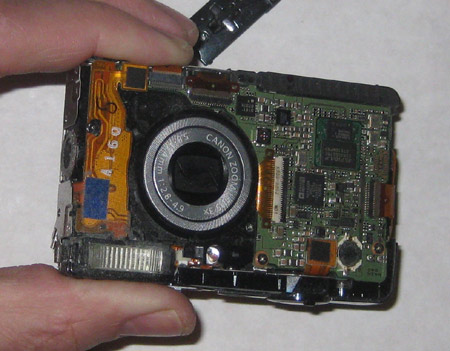
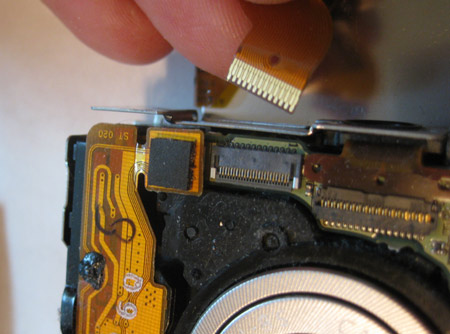
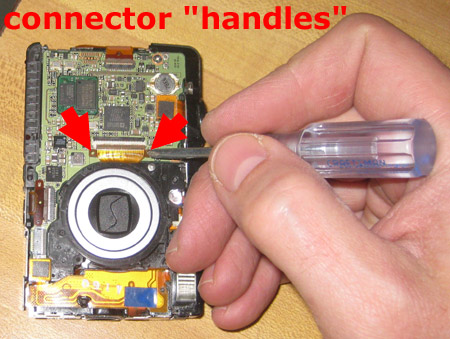
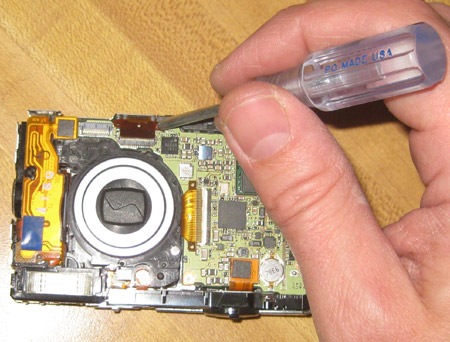
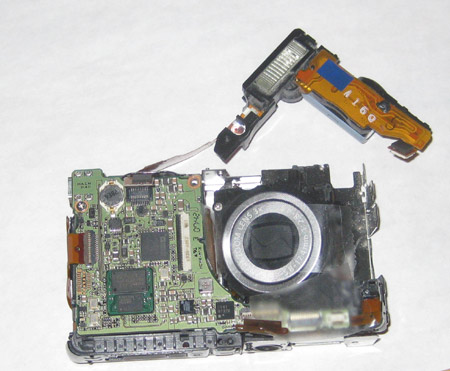
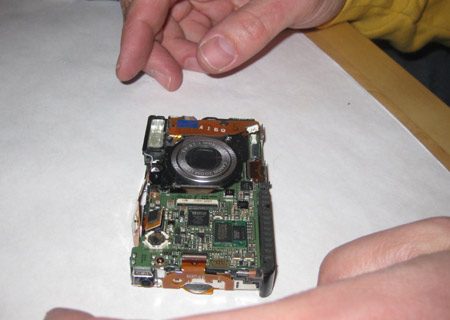
Once the lens mechanism was loose, I disconnected its ribbon cables. These included a 29-connection gold blade to the left of the word "ZOOM" on the lens and a 32 staggered blade connection below the lens. Handle these with the little round holes on either side. I used dull push pins to guide them.
|
|
|
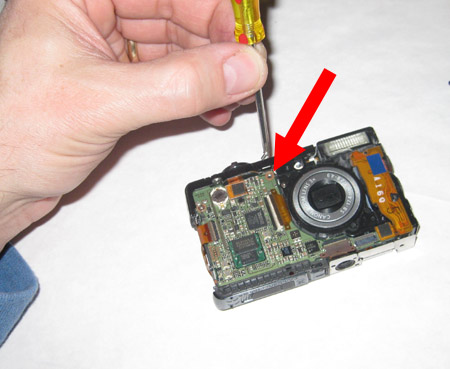
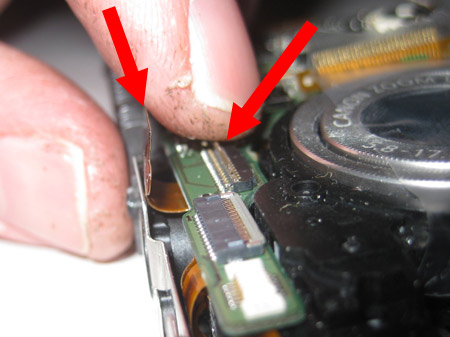
Remove one screw at the top right of the green circuit board, near the shutter button.
|
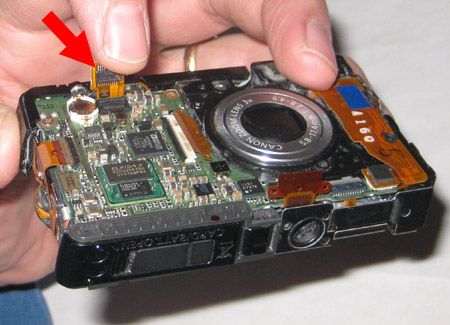
The black square cushion on an orange ribbon just below the shutter button is a rectangular electronics connection. Pull it up.
|
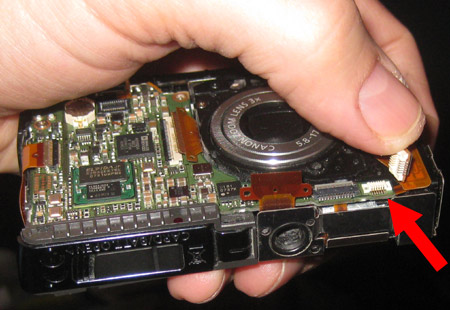
There is one more cushioned connection like this one at the lower right hand corner of the camera front (next to the ribbon connection points). Pull it up.
|
Remove the screw from the shell top, adjacent to the on/off switch.
|
This should release the black plastic top "L".
|
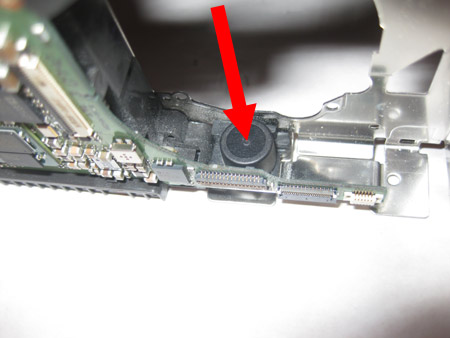
At this point the lens mechanism was quite loose, but I couldn't coerce it out of its nest. I saw one more screw that seemed to be holding it steady, but I couldn't get it to budge. I was done. I took a break while I found some smaller, jewelers-sized screwdrivers.
|
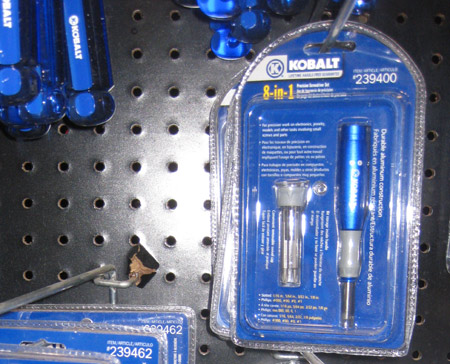
Usually, picking up pieces and setting a project aside at a moment like this is a huge mistake. No matter how sharp and detailed your notes, you start to forget how things fit together. Also, after a few days, it is easy to put the project on a permanent back burner. This is particularly true if the thing you are repairing isn't vital to your existence, such as a waffle iron or 9-iron. In my case, with the added incentive of an unfinished web article, I tracked down a multi-tip mini-screwdriver at Lowes and was back in business a few days later. |
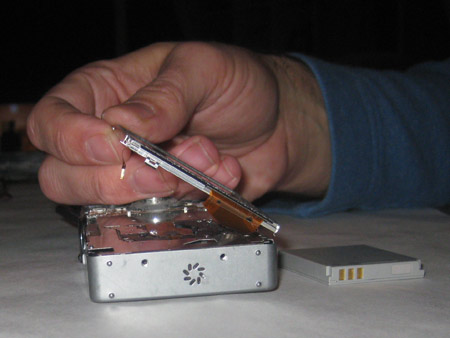
It worked. I should have found one of these at the beginning of this project. Maybe I can just erase those drilling photos and no one will know how foolish I am. With the Gordian screw finally out, I was able to slide out the flash/capacitor clump and rotate it up and out of the way.
|
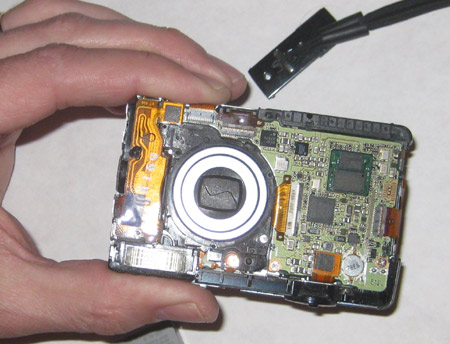
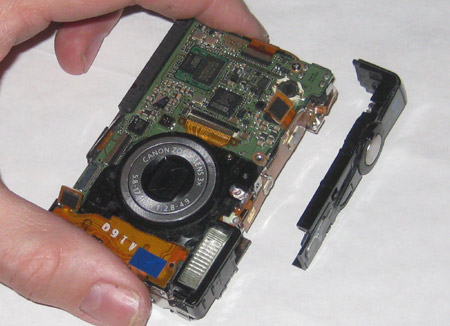
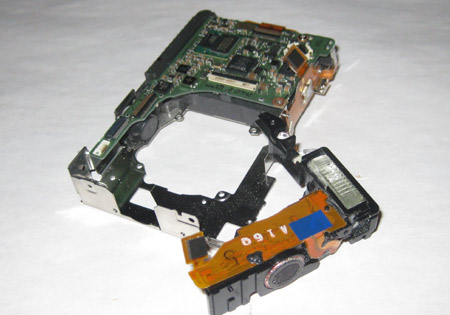
The lens mechanism came free!
|
At this point, a little black cap fell away from the camera. It was the camera tripod mounting socket from the bottom. I gently placed it back in its spot. One orientation seemed slightly more correct than another, so take a close look if you have to re-seat this little devil.
|
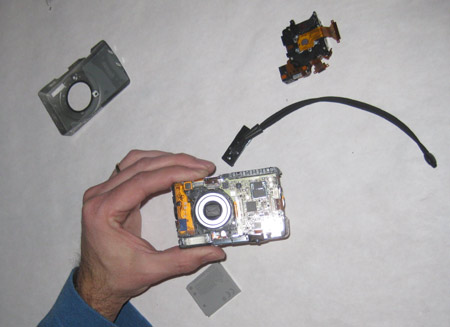
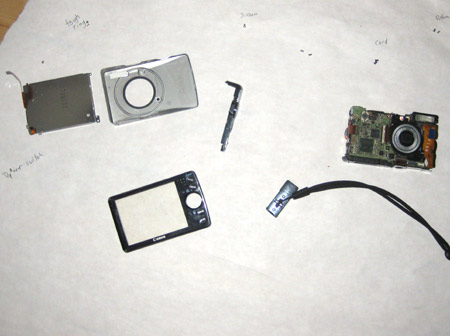
Alright, this was as disassembled as I needed to go. It was time to replace the lens mechanism and try to get this thing back into one piece.
|
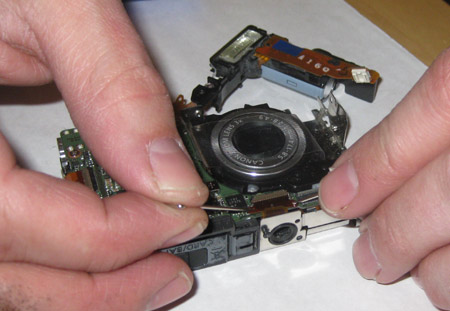
I wanted to prepare a better handle for the ribbon connectors, so I used a little adhesive tape on them. Even so, the cables connectors provided only the smallest amount of slack, so plugging them was one of the hardest parts of this project. First wriggle the lens mechanism into place, then the flash/capacitor lump. They pretty much squeeze in at the same time. Expect this gentle component dance to take five minutes. Screw them into place. I obviously didn't have the original screws, because I had drilled them out. I used my two originals and borrowed one more from another component.
|
Be sure that your fingertips are perfectly clean, and that you haven't spent the evening spray painting stuffed animals before trying this re-assembly.
|
Using push-pins to maneuver the ribbon cable into place. First the one below the lens, then the one to the left side of the lens.
|
|
Next, carefully place and screw on the black plastic top piece. Make sure the slide switches still operate properly under their covers. |
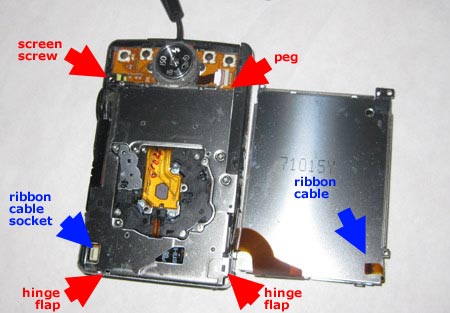
The LCD screen gets put back next, with its two ribbon cables being particularly tricky to maneuver into their micro-sockets. Remember, the wider cable folds onto itself and curls under the camera to plug in below the lens front. The LCD screen hooks into two frame hinges and folds down, held in place with one peg and one screw. |
|
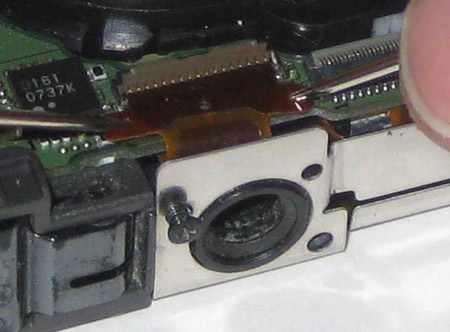
This rubbery white cover fell off during disassembly. I was happy to find its home in a previous photo: It fits onto this micro-microphone square. |
Once the LCD was attached, the rest of the camera body clamped on logically. Reattach the front shell, and position the wrist strap bracket so that it will sandwiched in with the back shell. Gently wriggle and squeeze the camera shell shut. The final screws can wait until you've got everything clicked into place. Once the outermost screws are tight, give it a gentle shake to see if anything is still loose. If not, drop in the battery and memory card and fire it up! |
For me, it didn't work. Well, it sort of worked, but a problem was literally glaring. The LCD was shining bright white, full on, no image. Crap. Undeterred I tried taking a few photos and the camera responded, flashing and beeping. It seemed like I was taking pictures. Zooming in rewarded me with a new grindy sound. That is not good. It did seem to zoom in and out though.
|
After a few shots, I pulled the memory card and stuck it into my computer. Pictures! Awesome.
|
No, wait, these pictures are all blurry! Damn. The lens was almost as bad as the first one.
|
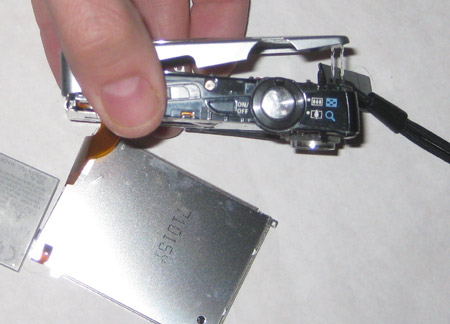
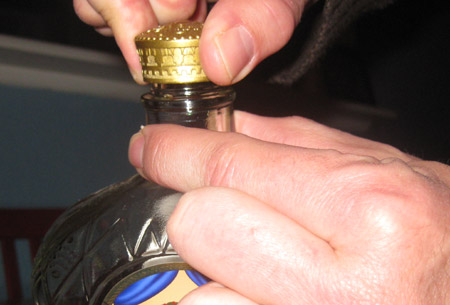
I adjusted my vision, turning this cap counterclockwise.
|
With the new lens installed, I was saddened to see more evidence of a rough life. These marks matched the chromed ring just below it. This lens was going back. Lets try this again. Its gotta be easier the second time, right? To be continued. |
Please continue reading page 2 |
Box of See's Candy Costume | Dwight Shrute Bobblehead Costume | American Idol Judges Costume | Sudoku Costume |
Fandango Paper Bag Hand puppet Costume | Doctor Octopus |
Banana Skin Coat | Jenga Costume | California Costume | Silver Wings Costume | Paparazzi Costume | Fish Alien Costume | Cockroach Costume | Africa Costume
contact Rob | science club | pranks |
How much is inside? |
Home |
Incredible Stuff I Made | Torn-up
Credit Card Application
February 6 th, 2009
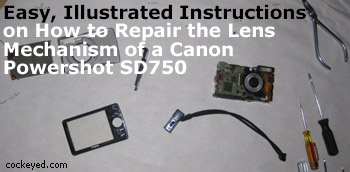
 These instructions and photos may also assist you in your plan for replacing or repairing the lens mechanism on the Powershot SD1100is, the SD880is, the SD790is, perhaps also the SD770, the SD870is, the SD630, the SD990is or the SD850, the SD870 or the the SD890.