


Easy, Illustrated Instructions on How to Sew a New Shade Structure Canopy for your Patio
Page 1 | Page 2 | Page 3
A few years ago, Stacy and I bought a steel framed shade structure from Target.
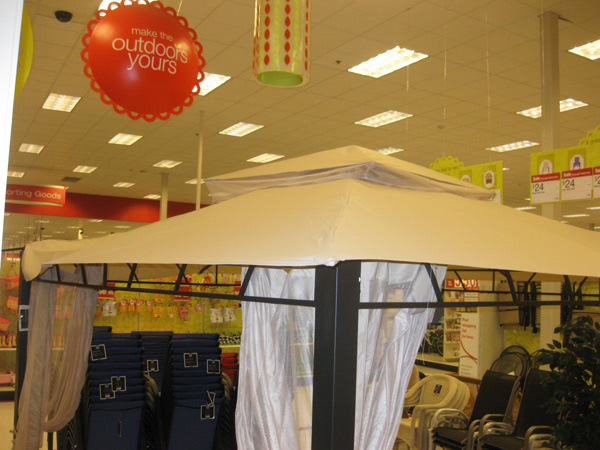
It had a lightweight waterproof fabric top and four mosquito net walls that could be zipped shut.
It was great to have a shady oasis in the backyard during the summer.

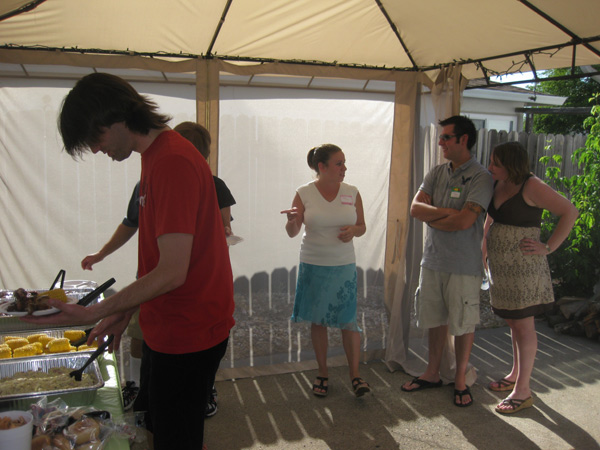
After a few years in the sun and the rain, The fabric top began to fade and rip. I tried mending it, but the fabric was too threadbare to hold stitches, and patches would have made it look like a hobo camp tent from a depression-era Mickey Mouse cartoon. Eventually I took the cover down.
I bought the wrong size replacement canopy (10'x10' instead of 12x12'), returned it and vowed to try sewing my own. I had taken some measurements and notes from the original canopy, and had even saved one fabric panel from the original.
But that winter, I got a sewing machine for Christmas!
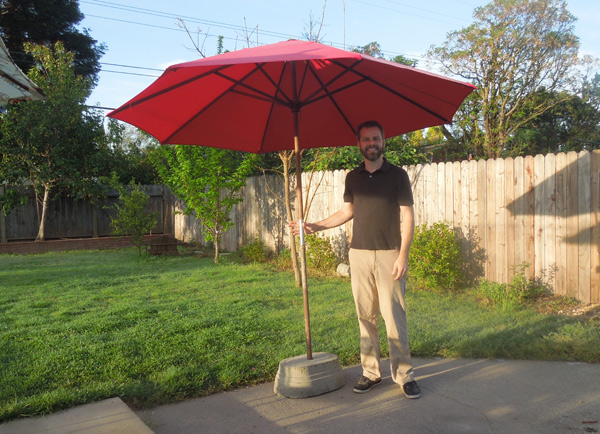
I was in business. After a few small projects to get my bearings, such as this red patio umbrella, I set about making the new canopy.
The shape was straightforward. Two parts: A large tipless pyramid comprised of four trapezoids, topped by a smaller pyramid, comprised by four large triangles. It wasn't complicated, but it was huge. Each seam was six feet long, and I'd have to start with a ton of fabric.
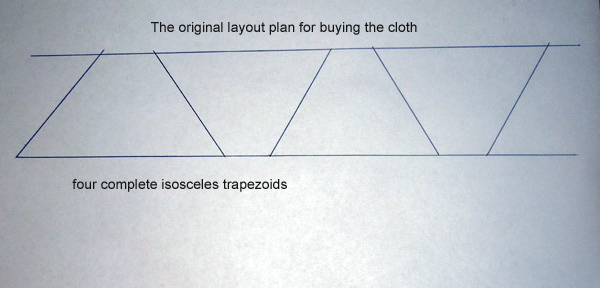
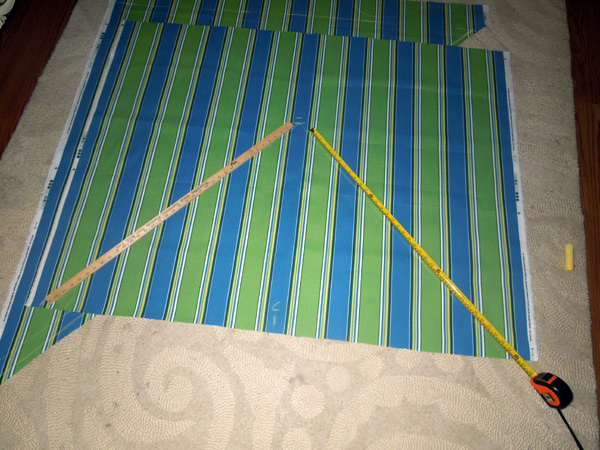
I planned on cutting the trapezoids from a single bolt of cloth, as shown above. That strip of cloth would have been 11 yards long.
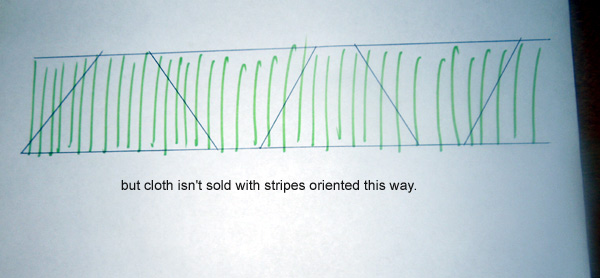
Unfortunately, the fabric store had some surprises for me. For one, stripes of fabric almost always went along the length, instead of across it. Also, laid out this way, there wouldn't be enough fabric in the width to add decorative scallops to the canopy. Even without decoration it was an inch short.
I needed a new plan.
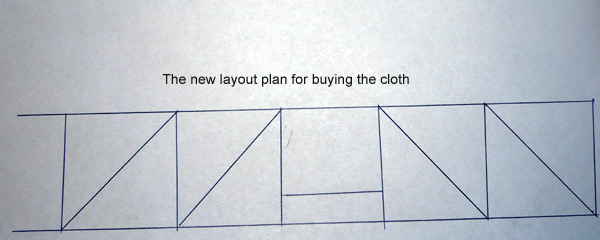
The new plan required the cloth to be cut into many more pieces, just to be re-assembled with the sewing machine.

This would add a lot of work to the project, but it was the only way to have the stripes oriented so that they ran down the awning, instead of across it.
I almost let the fabric dictate my design, settling for a solid canvas color instead... but then I came to my senses. What's the point of creating your own patio cover canopy if you can't make one which is better than the ones for sale on Amazon?
My canopy was going to have 1) vertical stripes and 2) decorative scallops!
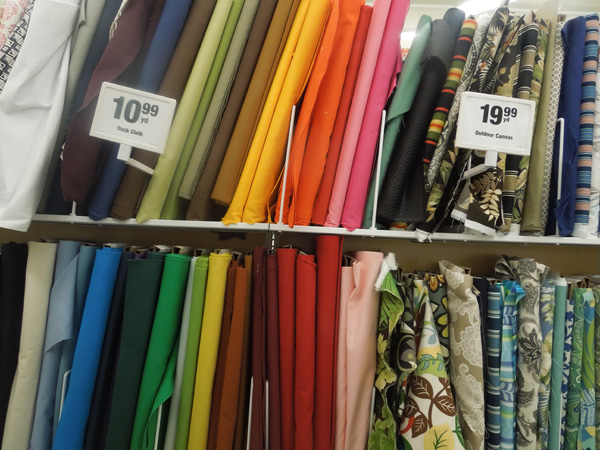
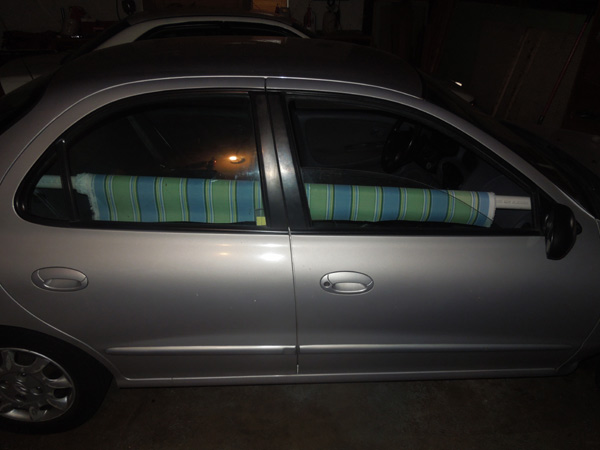
I ended up buying 16 yards of "outdoor" fabric and two spools of heavy duty blue thread. I buy fabric at a store called "Joann's Fabric". They almost always have coupons online or in their mailer. The total cost was $177.
Amazon has some nice patterns on their outdoor fabric too.
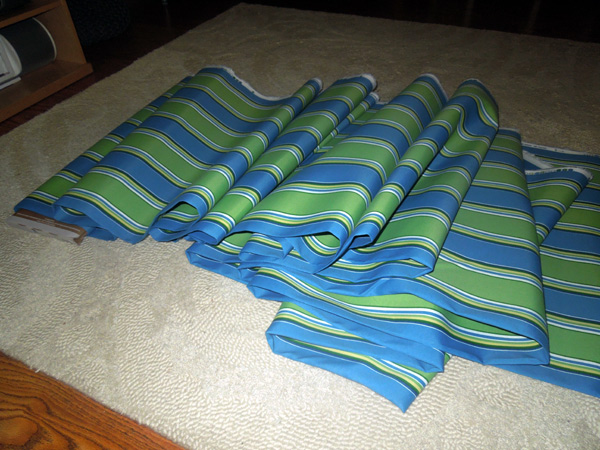
Here's a shot of the fabric's full width. There was almost 50 feet on that roll.
The pattern was a bit complex. Wide blue and green stripes with black, yellow and white accent stripes. The stripes would have to be aligned wherever they met another piece of fabric.
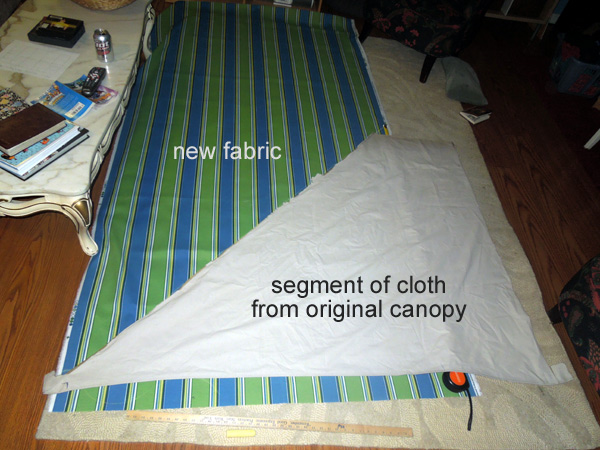
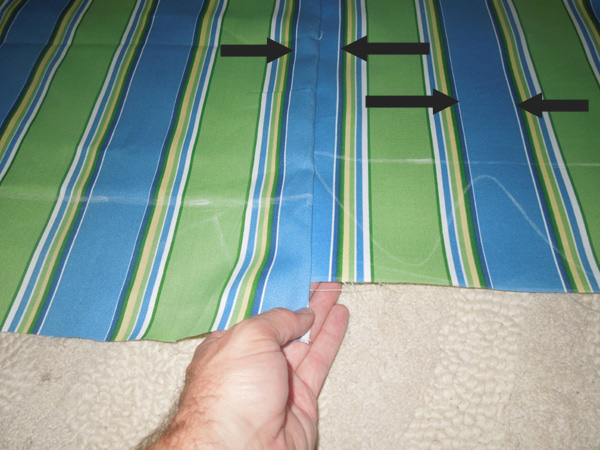
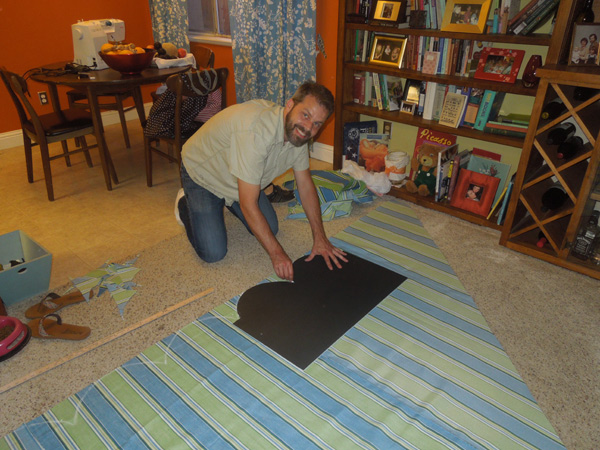
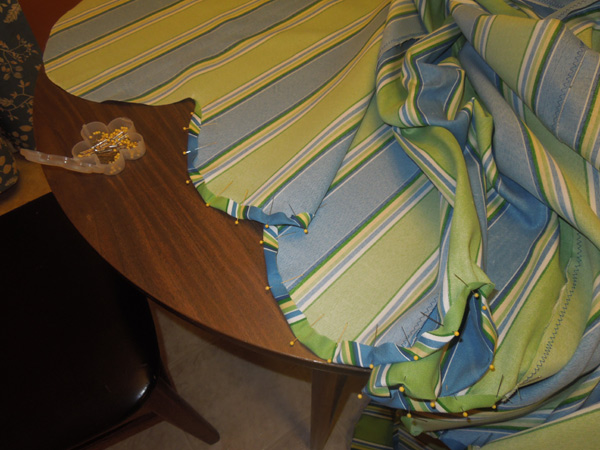
I had the measurements, but I didn't have faith that following the pattern would result in a well-fitting canopy. Luckily I had a slice of the old canopy. If I could just re-create the old canopy, I knew the fit would be perfect. In the photo above, you can see where I left five inches of extra striped fabric. This is the fabric for the scalloped edges.
I added a half-inch onto each edge, to allow room for the cloth which would be used in the seam connecting two pieces of fabric. That is a "seam allowance".

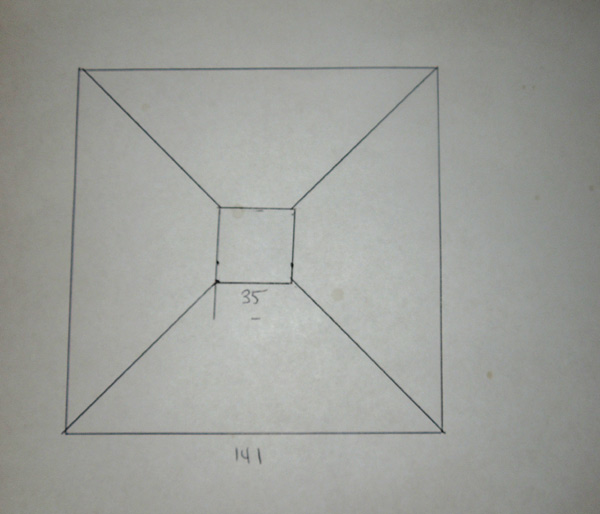
In addition to the triangular sections, I cut straight sections for the center panel of my trapezoids. Most of my panels began and ended in the middle of the blue stripe. As long as every part ended in blue, I'd be able to fashion a regularly-striped span of cloth, and a uniform-looking canopy. I'd have to adjust the width of the stripes to end up the correct final size (141"). I have to say I got lucky with the stripe width though. None of them ended up too thin or thick to be obvious.

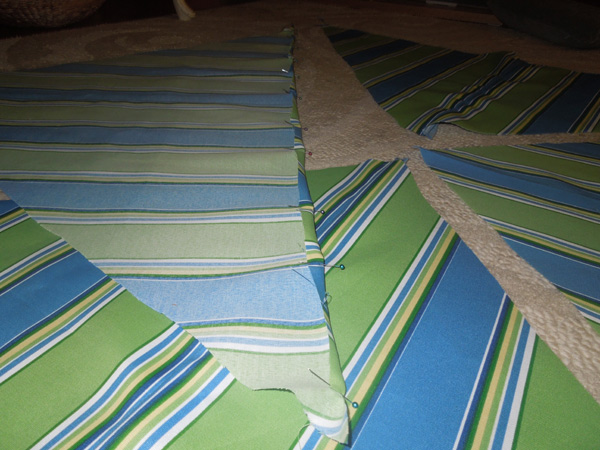
Before connecting the large panels of the canopy together by their sides, I put a seam into the top and bottom edge of each trapezoid.
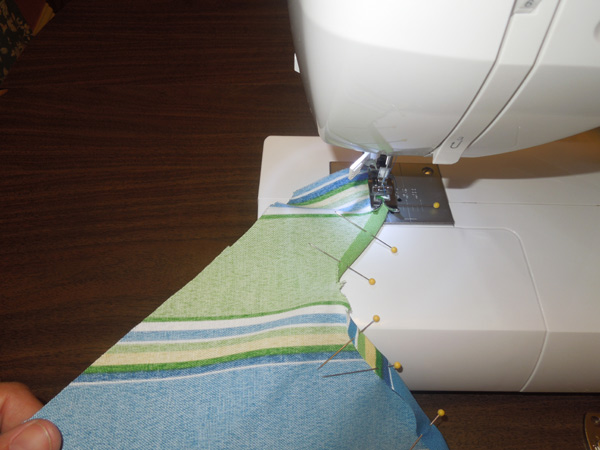
Next I pinned together the first two panels and prepared to sew them together.
In the photo above, you can see the width of a stripe on a seam compared to a regular stripe. I used chalk to draw temporary construction lines on the fabric.
In addition to my large panels, I needed four triangles for the smaller top pyramid.
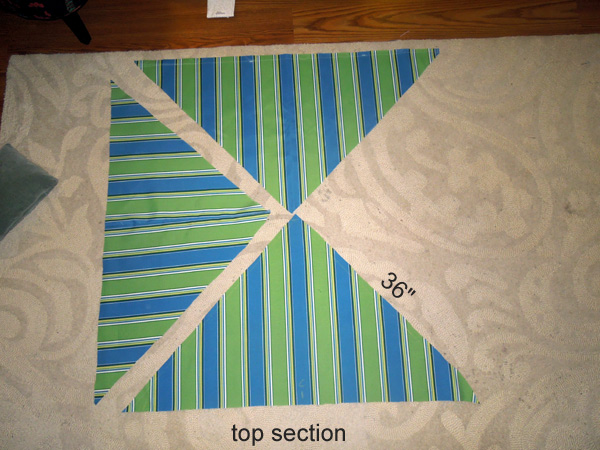
Even these smaller parts were large pieces of cloth, measuring 36" along the short edges. I didn't have quite enough cloth for all four of these to be unbroken panels. I had to construct two of them.
You can see a constructed one on the left above. It has a narrow blue stripe in the center.
Pinning an edge before sewing. This isn't the usual way to pin cloth, but I did it this way until Meaghan pointed out the easy way to pin.
To help with my confidence in this project, I completed the top pyramid first. It looked great!
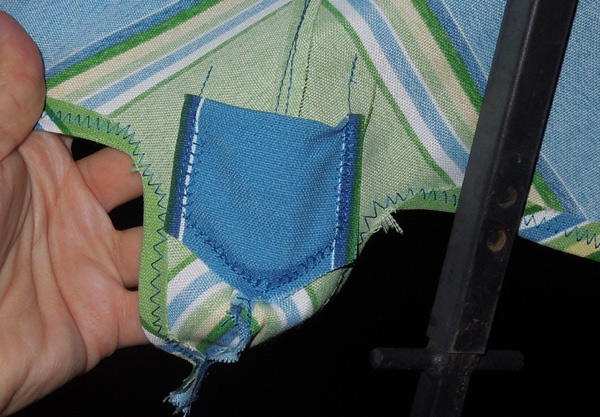
Notice the blue, diamond-shaped corner pockets holding onto the metal frame.
I cut and double-stitched the fabric for these pockets, anticipating that they would be subjected to considerable pressure and wear over time.
Back to the main canopy.
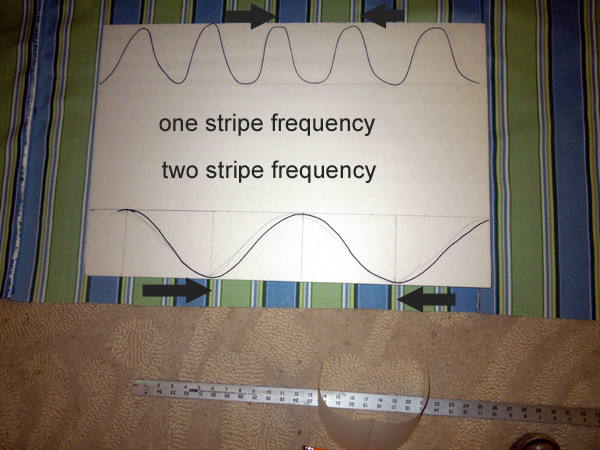
After I had assembled the four large trapezoidal panels, I tackled the question of how to space the scalloped edges. I thought they would look odd if they didn't align with the color stripes.
I prepared two options, a scallop at each green stripe and one scallop at every second stripe. The wider scallops looked better, and these test sketches made me realize that a sine-wave pattern wasn't as attractive as regular scallops.
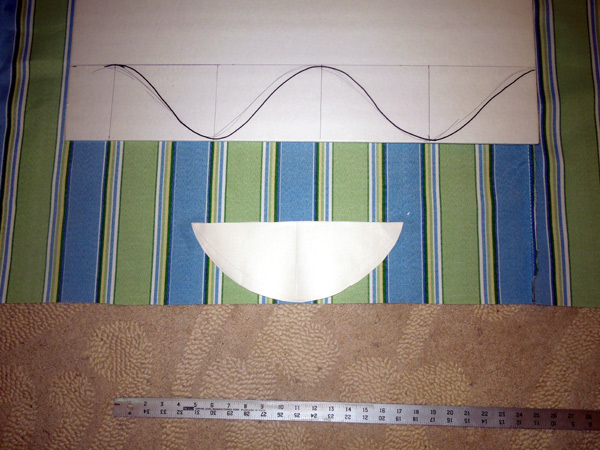
To get a symmetrical scallop shape, I folded a piece of paper in half, sketched an arc and cut it out.
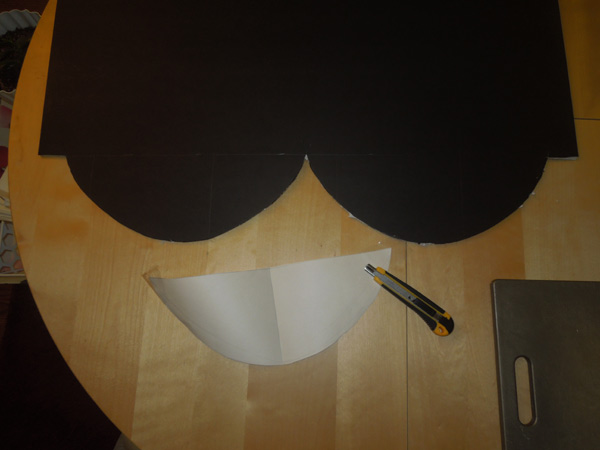
Then I transferred this pattern to a more substantial piece of foam core board so that I could use it as a stencil.
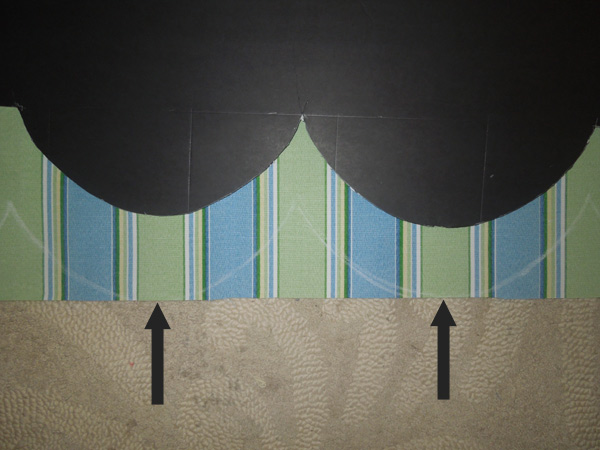
It worked like a charm. The stencil allowed me to draw perfect chalk arches onto the fabric which each ended near the center of the green stripe.
Drawing some scallops with chalk.
Pinned scallops.
Sewing scallops. This took forever because there were four huge panels, each with 141" of scallops.

A closeup of the finished scallops and stitching. There was some puckering, but I was satisfied with how they turned out.
I couldn't wait to see this edge hanging down from a completed canopy.
It had been strange to calculate and add an extra five inches to every panel on this main canopy section, knowing it wasn't necessary, just decoration. After I was done, I loved the addition, and figured out that adding them had added 60" of cloth to the project, which cost $17. So, not counting labor and thread, adding scallops tacked $17 on the project.
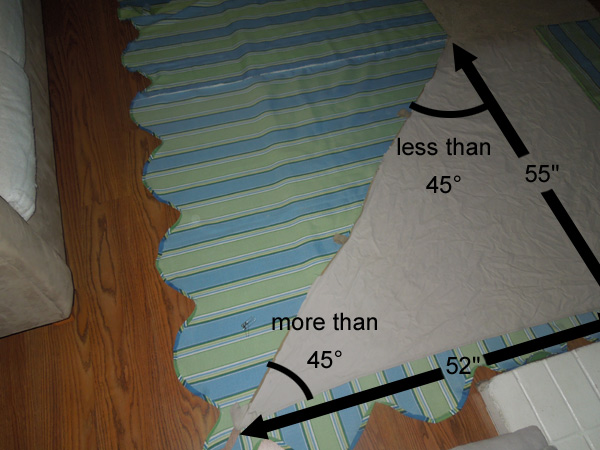
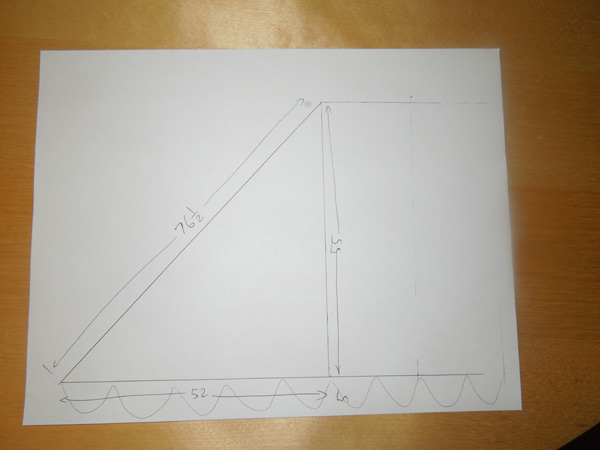
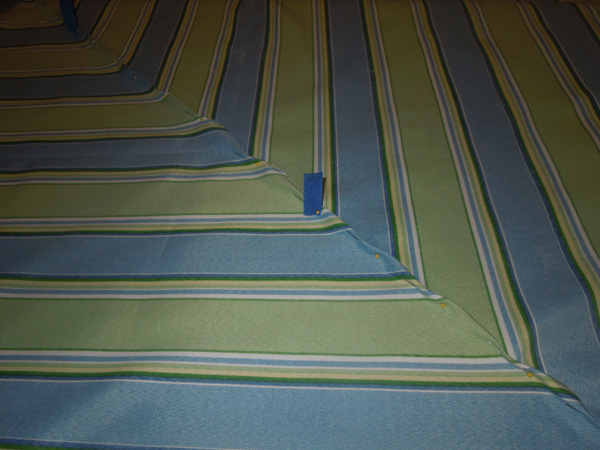
I had to make a conscious effort to not align the first two panels at a 90° angle.
Because the canopy forms a pyramid shape, they meet at unexpected angle. The bottom angle is close to 45, but it is actually the tan-1 (55/52), or 46½º. The top angle is the tan-1 (52/55), or 44½º.
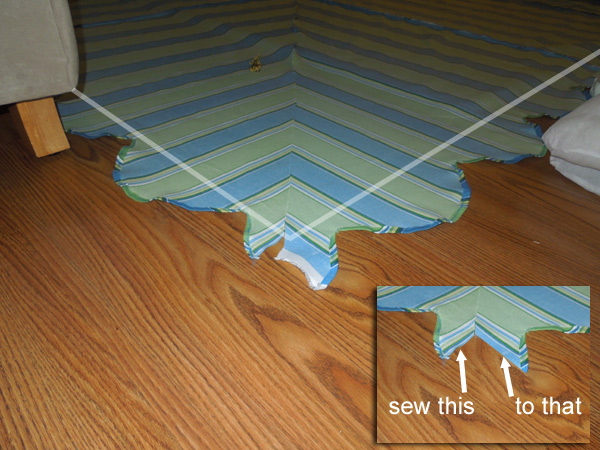
At the corners of the canopy, I had to resolve the corners where one set of scallops met another set. If you can imagine these two half-scallops hanging down, if everything worked out right, they would be hanging right next to each other. I sewed them together to form a little half-size corner scallop.
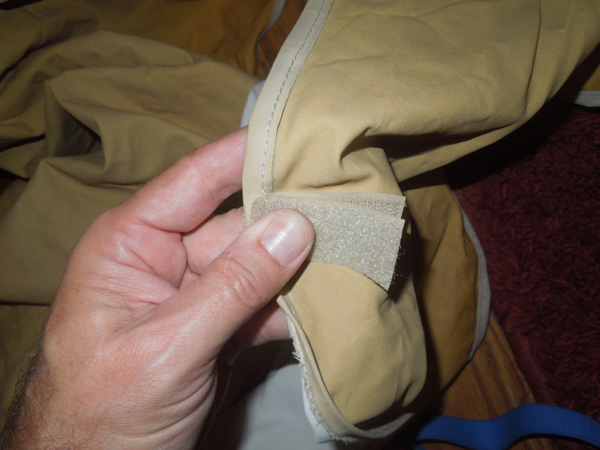
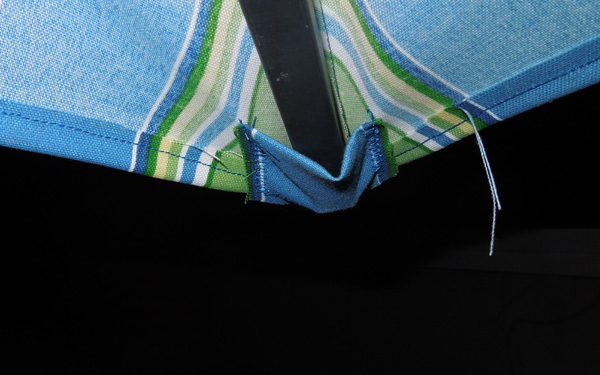
The canopy was held down by the corner pockets, and also by velcro straps which allow attachments to the shade-structure's iron frame. The original tan canopy had two sets of velcro tabs sewed into the seam down the edges. They are right on top of each other.
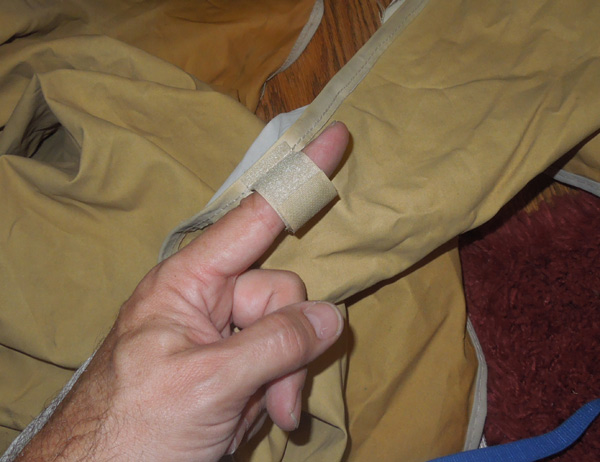
The tabs wrap around a metal rod, the hook and loop surfaces meeting each other.
I copied this arrangement to add my own tabs.
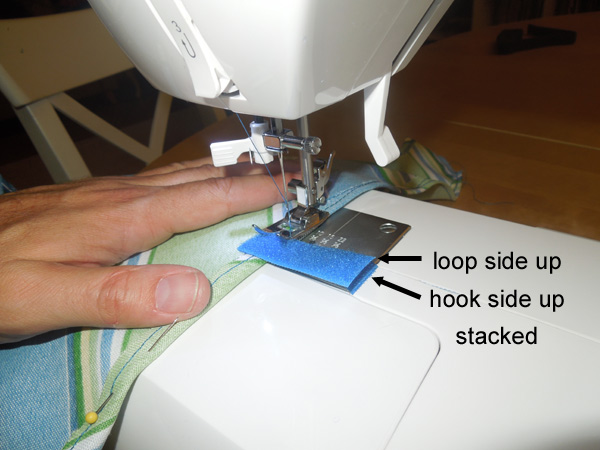
Here's a photo of sewing them into place. This was the most strenuous job for my sewing machine on this project, poking through two layers of velcro and a few layers of outdoor fabric. Next time I will probably start with a heavy-duty needle.
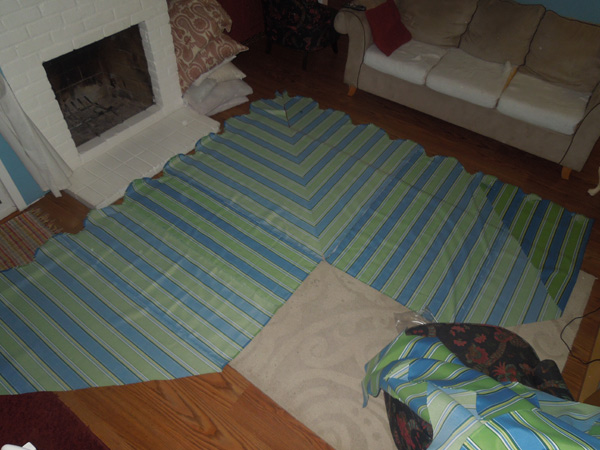
Two panels laid out, a little bit too large for the room.
By the end, I was hauling the entire load of cloth around the room, trying to align the next seam with the path of the needle. I was happy, because I was almost done!
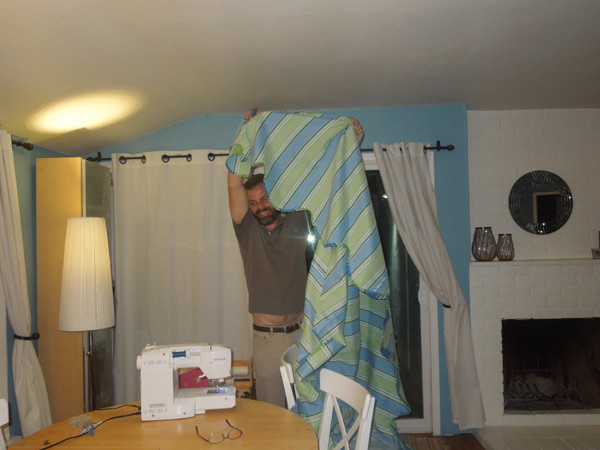
At this stage, even though I had draped the half-finished project across the frame twice, I still had a fear that the canopy wouldn't fit correctly.
The position of the corner rod pockets was critical. If they were too loose, the canopy wouldn't hold tightly on the frame. If they were too tight, I wouldn't want to be able to stretch the canopy onto the frame at all. A wiser man would probably have sewed them on with a single stitch, but I went all out, attaching them with a double row of stitching.
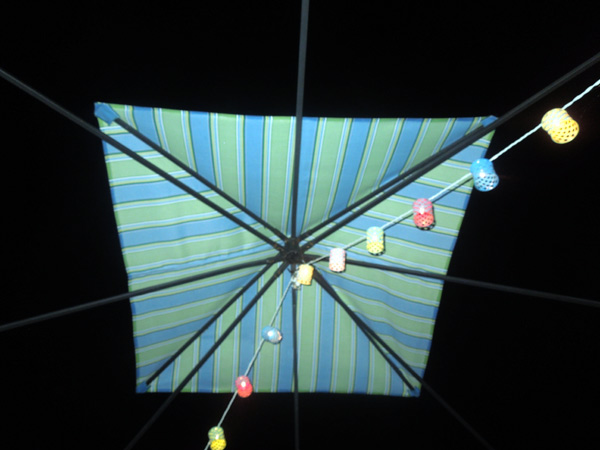
It fit! The corner rod pockets held the canopy tightly, but I didn't have to wrestle it into position. The velcro worked too. holding the seams tightly to the frame.
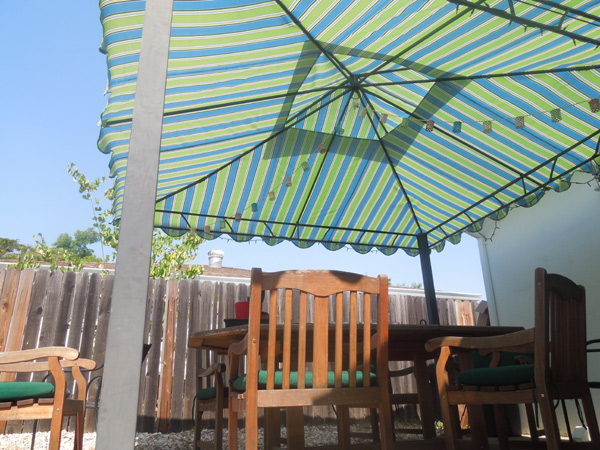
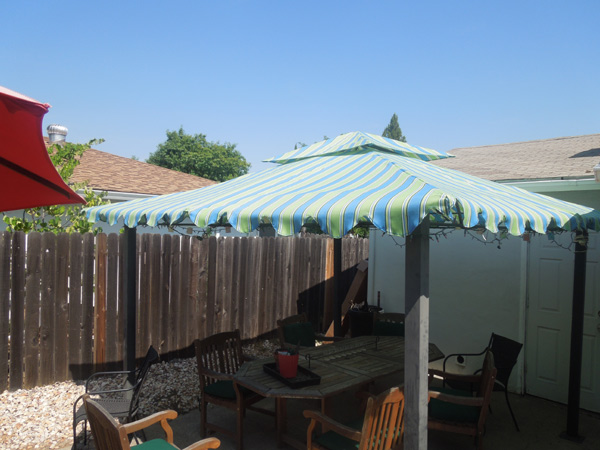
It looked really good! This was the largest thing I had built in a while. It felt great to be finished and to have the final product fit so well. I didn't save any money making my own canopy, but I am certain I've got one of the best looking shade structure canopies in town.
One motivation to finish sewing the canopy was a pending backyard party for Anna's visit to northern California. I was thrilled my new canopy could help overshadow her visit!
Please Continue Reading Page Two of the Easy, Illustrated Instructions on How to Sew a New Shade Structure Canopy for your Patio
page 1 | page 2 | page 3 | page 4