


Easy, Illustrated Instructions on How to Fix Dull, Faded, Weathered Headlights on Older Cars
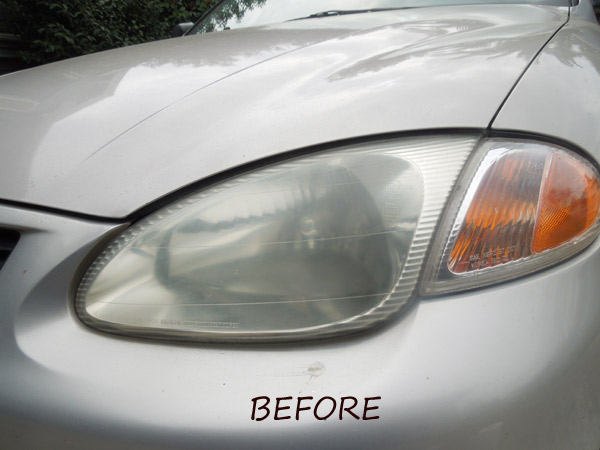
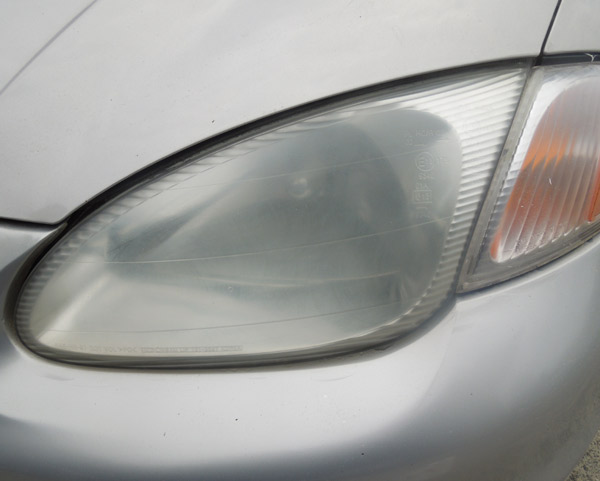
After about 10 years, plastic headlights begin to look cloudy and dull. This is troublesome because everything else on the car's exterior will probably still look great.
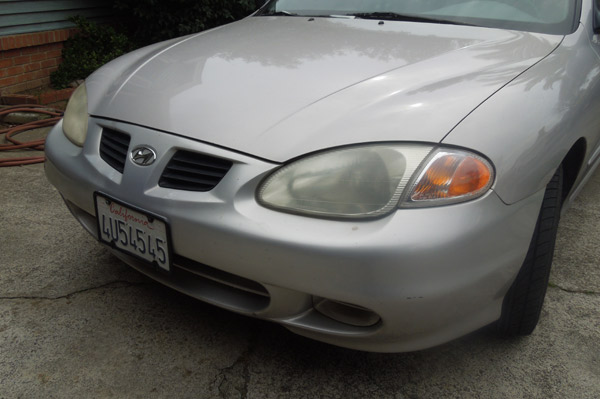
The headlight lenses are the first thing to go. But they are probably the easiest to renew, as it turns out, almost as easy as washing the car.
I was introduced to the concept of polishing the headlight lenses in 2010 when I saw a strange guy polishing headlights out in the parking lot of my job. He had a power drill and a little kit of equipment. He was clearly detail-oriented and doing a very careful job.
I didn't get a chance to see the finished headlights, but I assumed he had restored them to a like-new condition.
He was probably charging $100.
Last year I let a gas station salesman demonstrate his spray-on Carnuba Wax product on my headlights. It made a huge difference, but the effect faded about 10 days later.

Finally, I saw this $10 lens polishing kit for sale at Harbor Freight Tools, an infamously cheap tool store. I bought one immediately. Read the rest of this article, but if you are interested in buying a kit like this, you can get them at Harbor Freight or at Amazon.com.
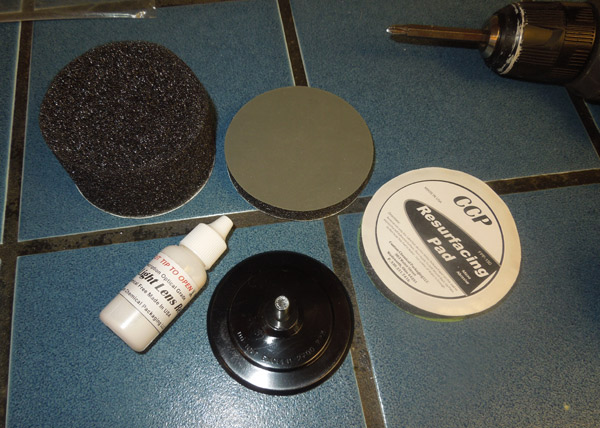
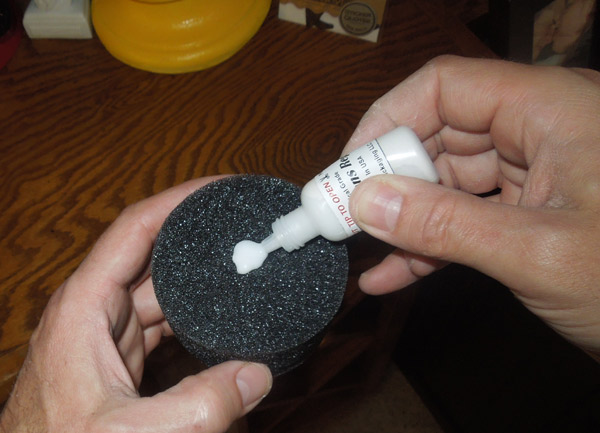
Inside the kit, there were five parts: a tiny bottle of Headlight Lens Polish, A drill adapter, two abrasive resurfacing pads and one black sponge polishing pad. The pads each had one side covered with adhesive to adhere to the drill adapter.
The kit came with directions. The directions are simple:
- Mount the drill adapter onto a drill
- Resurface the headlights for three minutes each, spraying water onto the lens as you work.
- Polish each headlight for at least three minutes, using the polishing pad and compound.
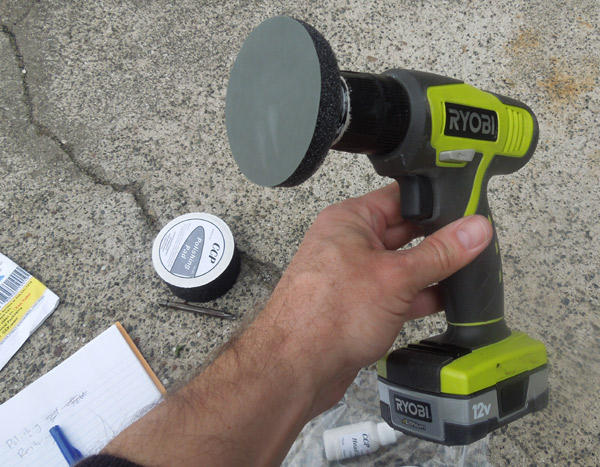
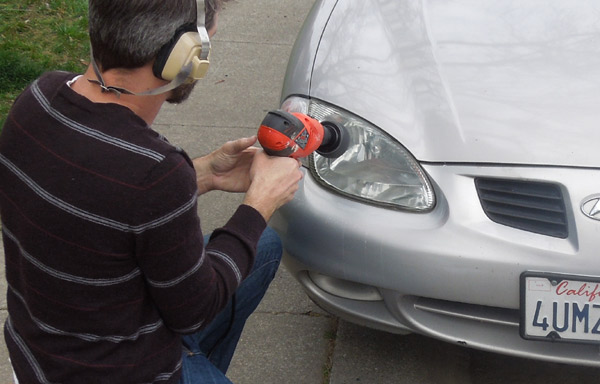
The directions recommend using a corded power drill. I didn't have one handy, so I used my Ryobi cordless drill. In the photo the adhesive pad is stuck to the drill adapter, and the adapter is in the drill chuck, ready to go.
I also prepared a spray bottle of water.
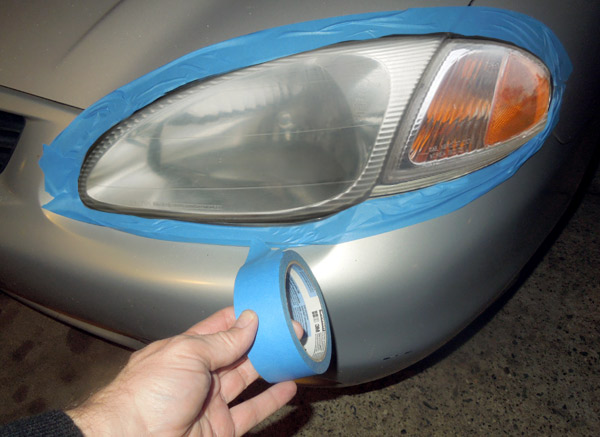
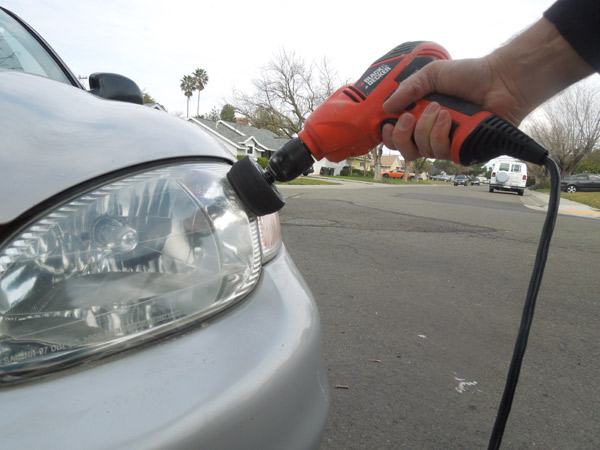
To protect your car's paint job, you should mask off the area of the car surrounding the headlights. I didn't bother, because my car's paint job is already marred in places and I am confident in my ability to sand between the lines. Only later did I realize I'd have to mask them off so that I could snap an illustrative photo including the extra step of painstakingly photoshoping the lens to make it look dull again.
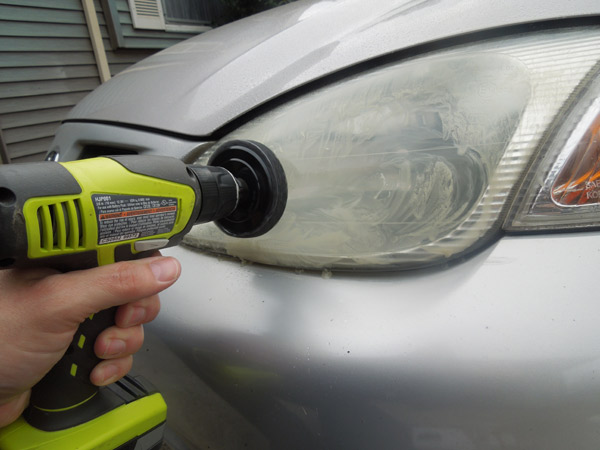
With a few squirts of water, I began sanding the lens. Whenever the headlights get wet, the tiny cracks are obscured, so the plastic immediately looked clearer.
But they weren't actually getting clearer. They were getting foggier.
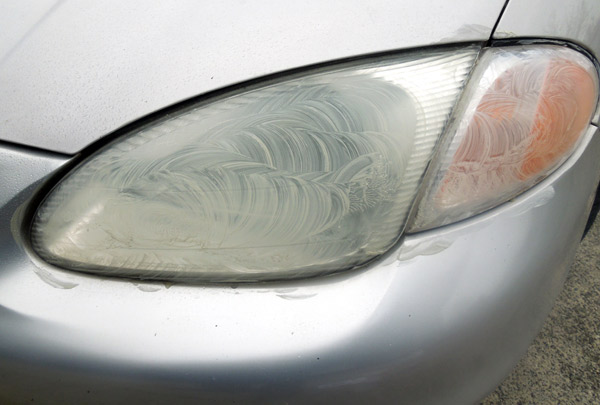
The resurfacing pad was sanding them. Adding a million tiny scratches, but hopefully removing any larger ones.
After three minutes of resurfacing, I stopped and cleaned the lens. As expected it was uniformly dull.
Next, it was time to polish the lenses.
I peeled off the abrasive disk and replaced it with the "buffer" disk. The buffer disk was a puck of surprisingly thick black sponge.
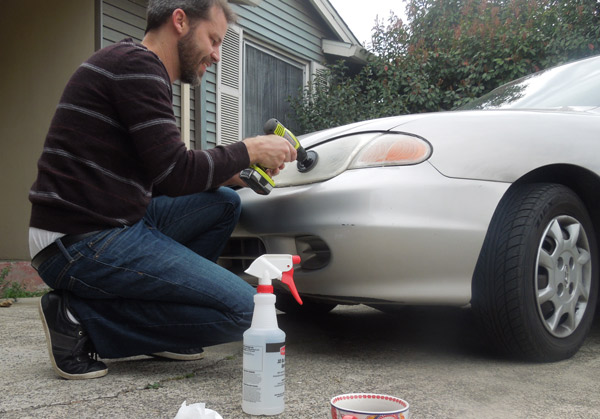
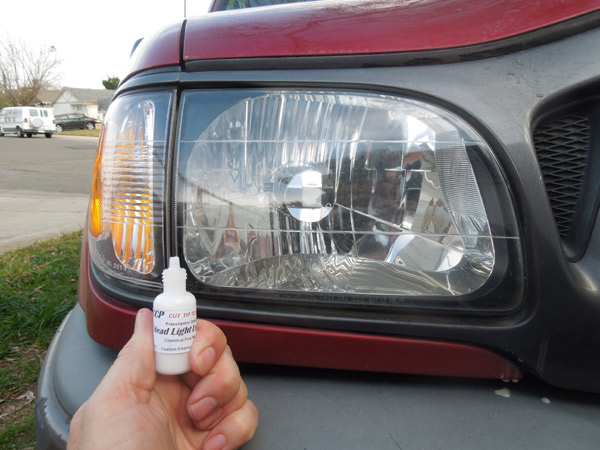
Onto this I added a dime-size dollop of polishing compound.
I don't know what the polishing compound is, but it is labelled as being "chemical free" and "optical grade". Rubbing it between two fingers, I could not detect any particles or grit whatsoever. The instructions stressed that I should be more careful about spraying water onto the work during this polishing stage, because too much water would just wash away this little spurt of compound.
Before I started the drill spinning, I pushed the pad around the headlight, spreading the compound around to every part of the headlight surface. Then I started the drill back up and started polishing the headlight.
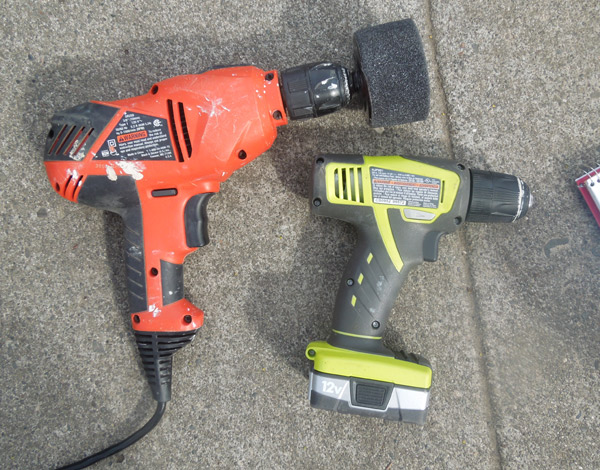
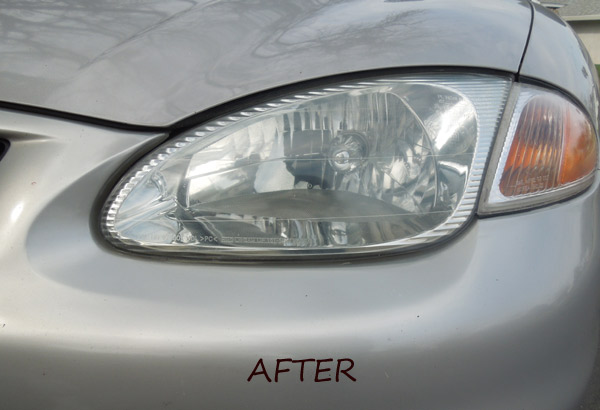
Unfortunately, I didn't get far. My cordless drill died. Unfazed, I borrowed a corded drill at my parents' house and continued the job. Dragging an extension cord out was added labor, but this corded drill was much faster and more powerful. I was polishing the hell out of this headlight, and it immediately started clearing up. It looked great! After about four minutes of polishing, the first lens looked awesome, crystal clear and like new. What a rewarding process!
Check. It. Out.
It looked great! After about four minutes of polishing, the first lens looked awesome, crystal clear and like new. What a rewarding process!
Check.
It.
Out.
When you improve something this much with just a few minutes work, it is incredibly satisfying.
The other headlight was just as easy, with one more dime-sized dollop of polishing compound and four minutes of polishing. Shazam! Man, what a difference! I used light to medium pressure against the headlight, and just a little bit of water sprayed onto the surface when the operation started to dry out.

At this point I had the equipment out, so I offered to restore the lenses on my parents' Toyota Truck, which they accepted.
I didn't want to detach the black polishing sponge from the drill adapter. I didn't think the pad adhesive would stick again if I removed it to swap to the second resurfacing pad, and I didn't want to leave my parents' headlights in a "resurfaced but not polished" state.
On a hunch, I decided to skip the first (resurfacing) step and to simply charge ahead with polishing only. In fact, I decided to try polishing compound on one headlight, and toothpaste on the other one.
It worked, with nearly identical results. The dullness was gone in one step when I just polished with the black pad and polishing compound. It took about five minutes.
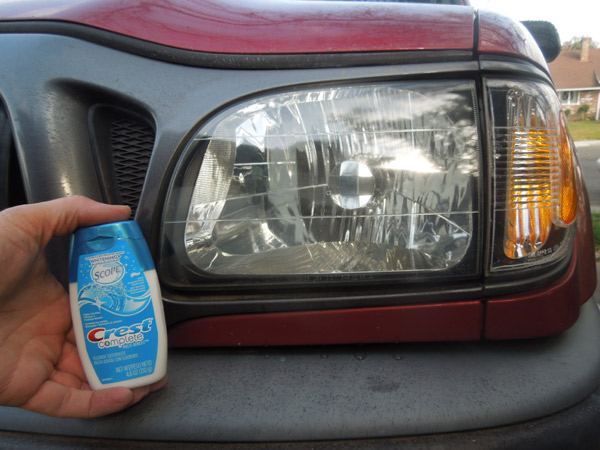
And, what a surprise, the toothpaste worked just as well. This Crest Complete toothpaste has no discernable grit to it, so I felt confident rubbing a little into the plastic headlight lens. It completely cleared the fog. Both Toyota headlights looked great!
Summary
If you have white, foggy headlights, you should definitely consider doing this yourself. It was very easy and vastly improves the beauty of the car's exterior. This is a cliche, but it takes years off of the apparent age of the car.
Considering the same effect is achievable using ordinary toothpaste, did I waste $10 on a headlight restoration kit? I don't think so. The small-diameter drill buffing adapter was alone worth the price. Without it, I'd probably still be out there, brushing my headlights with my Sonicare.